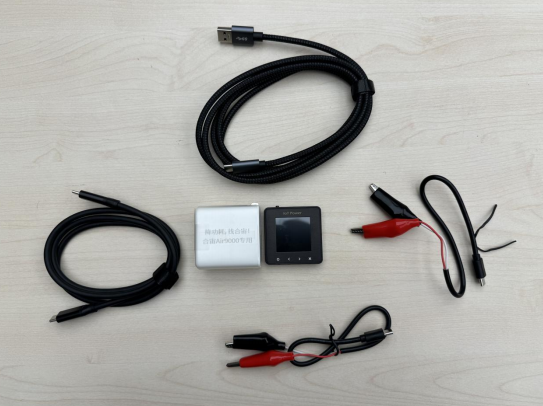
Open the DWM-Air9000 box and you can see the package list which includes all of the parts below:
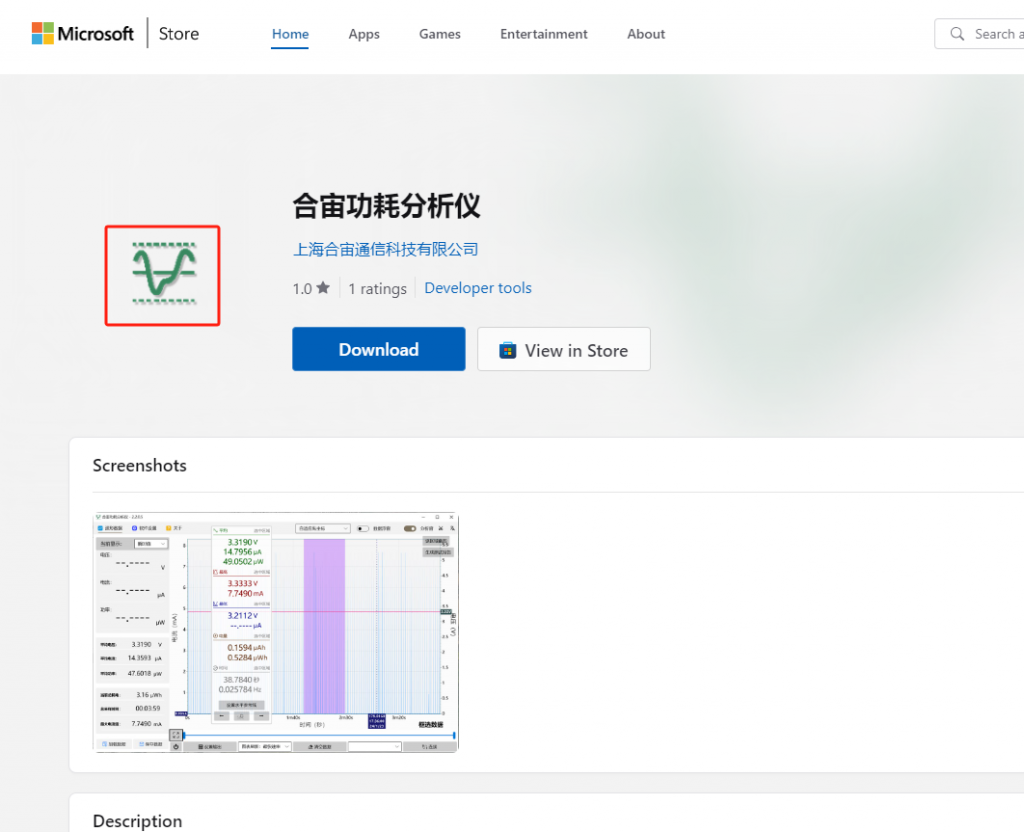
Open the Microsoft Store and download the IoT Power PC tool:
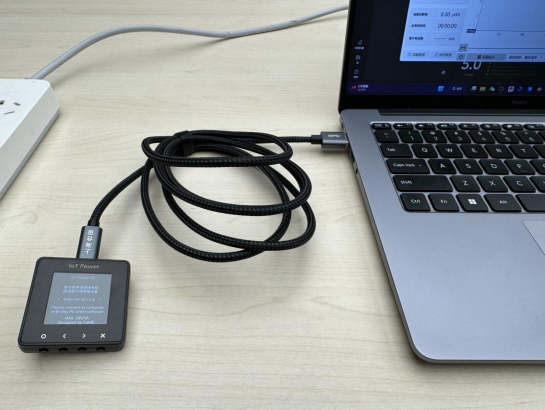
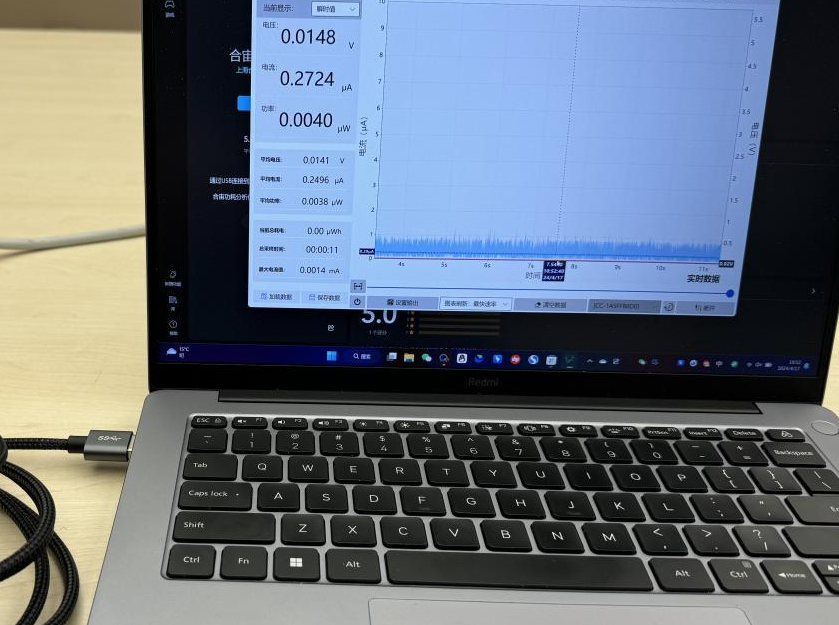
Connect the device to the PC with A2C wire:
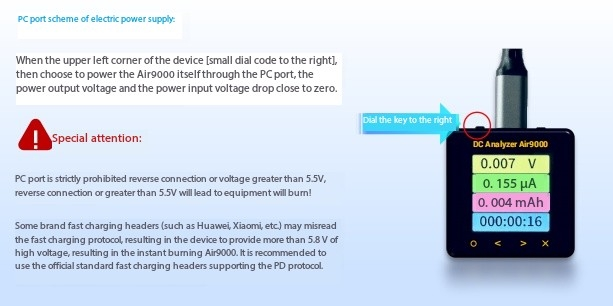
The small dial switch is switched to the right side which is powered by USB by default:

Click the “Connect” button in the lower right corner of the PC tool to connect the DWM-Air9000

The first connection to the PC Tool opportunity prompts you to upgrade the DWM-Air9000 latest firmware, and click “OK” After the software is successfully upgraded, you need to click “Connect” again.

After successfully connecting to the DWM-Air9000, the PC tool displays the circuit ripple random value.
DWM-Air9000 Turn to the PD function page, you can see that the PD / PPS function has been opened by default, which is the premise of adjusting the voltage output value of the charging head;
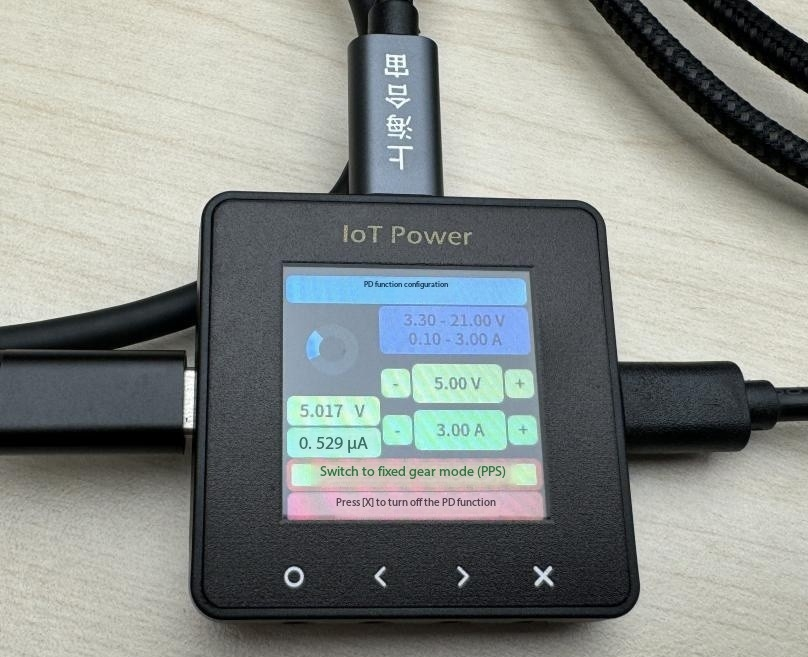
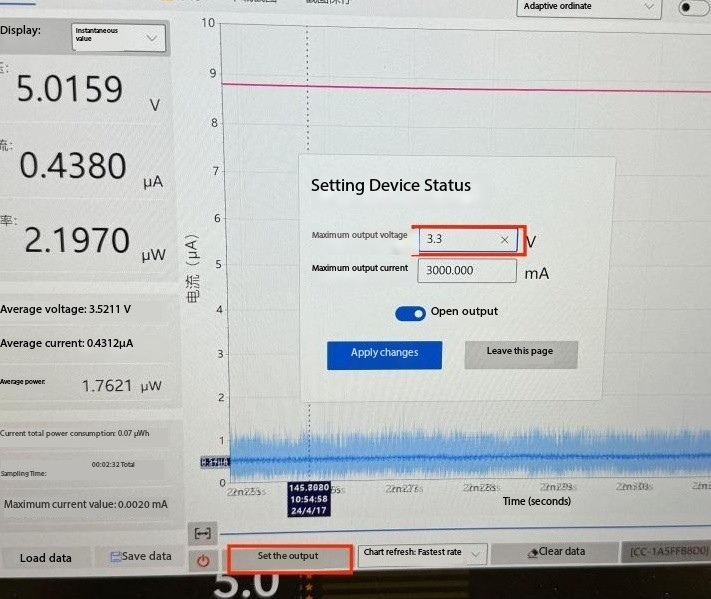
The default voltage output value of the charging head is 5V, You can reset the output value to 3.3V as follows example:
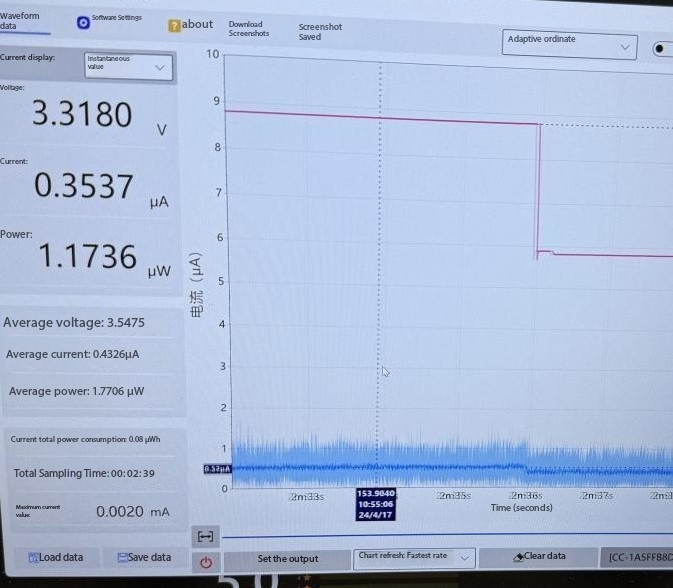
After resetting done you can see below shows:
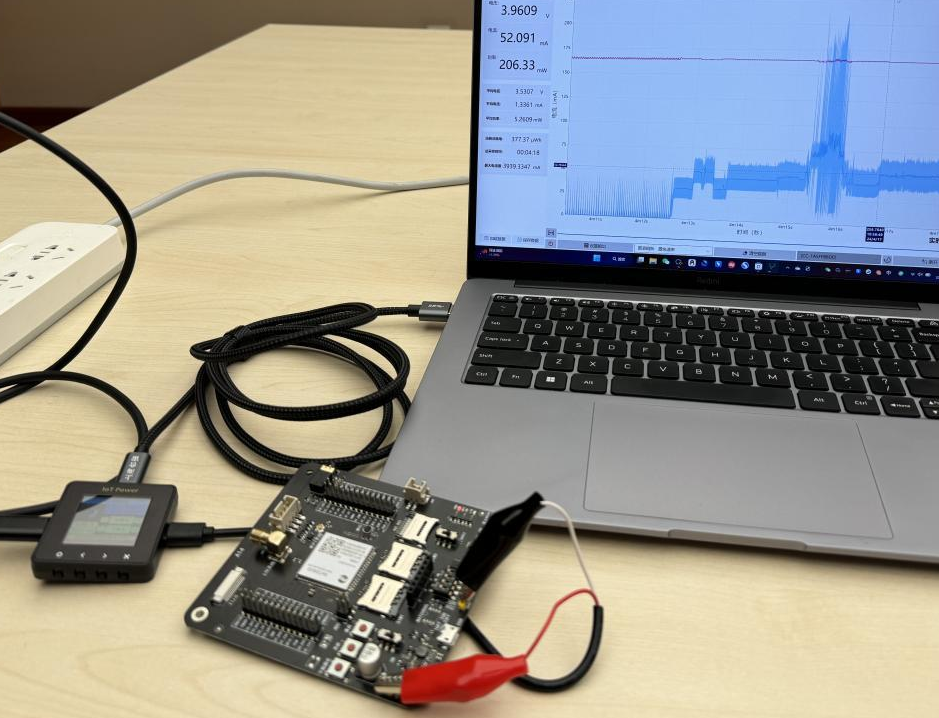
Now you are ready to test your device here is an example: